Even when you’re not using the car, the battery will drain. If you’re lucky, this happens very slowly, and the car will start right away when you want to use it again. However, if you leave the lights on, the battery will drain faster. This can result in the battery not having enough power left to start the car. In this case, the explanation is straightforward, but that’s not always the case. If the battery drains faster than usual for no apparent reason, there’s likely a leakage current. This means there is at least one component in the car that continues to consume energy when it shouldn’t. This happens even when the ignition is off and the car is locked.
If your car is equipped with an alarm system or a remote control for the central door locking system, there will always be a small leakage current. These systems remain active and must respond to incoming signals. A leakage current of 30 to 40 mA is normal in this case. The amount of energy a battery can supply is expressed in Ah, or ampere-hours. A 45 Ah battery can therefore (in theory) supply a current of 1 A for 45 hours. If the leakage current is 30 mA, the battery should theoretically last 1,500 hours—almost 9 weeks. The lower the leakage current, the better.
The battery voltage is also used to retain the settings for the engine and the radio, among other things. For this reason, if the battery has been disconnected, you’ll need to reprogram the radio station settings or have the car relearn the idle speed. Retaining these settings requires little to no energy, and in fact, no current flows.
To measure the leakage current, you’ll need a multimeter capable of measuring direct current (DC). Not all multimeters can do this. We’ve all heard of AC/DC (Thunderstuck? 😉).
AC stands for Alternating Current, and DC stands for Direct Current. The batteries in our cars are 12V DC (actually 6 cells of 2.1V each, so 12.6V). Most multimeters capable of measuring direct current have a maximum measurement range of 10A (amperes). That’s more than enough for what we need—at least as long as we don’t try to start the car or turn on other high-power consumers like the headlights or seat heaters while taking such a measurement. The multimeter itself also has a fuse for protection, but things can still go wrong. More on that later.
An alternative to a multimeter is a current clamp. It can measure the current flowing through a cable by clamping around the cable. This doesn’t always work with car wiring, because the wires are usually bundled together.
Enough about the theory for now. Let’s get to work. Before we start taking measurements, we need access to the battery and the fuse boxes. There’s usually one fuse box under the hood and one inside the cabin. On the NA and NB models, the battery is located in the trunk; on the NC, it’s under the hood. Since we want the car to be as still as possible, we need to be careful with the lights. If the trunk or a door is opened, the lights may turn on. Sometimes this also happens when the hood is open. The latter is the case, for example, with my NBFL. When the hood is open, the license plate light stays on because the alarm system is designed to do so. Leaving an OBD2 adapter plugged into the OBD2 port isn’t a good idea either. It just stays on and can consume 40 to 50 mA. It’s better to remove the adapter from the OBD2 port after use.
Close the car doors, or tape over the switches so it looks like the doors are closed. For the trunk, you can manually lock it while keeping the trunk lid open. If the car thinks everything is locked, it will go into a sort of standby mode and minimize power consumption. The more electronics the car has, the longer this takes. Starting with the NC, communication within the car takes place partly via the CAN bus. Many components communicate with each other over this CAN bus until they “fall asleep.”
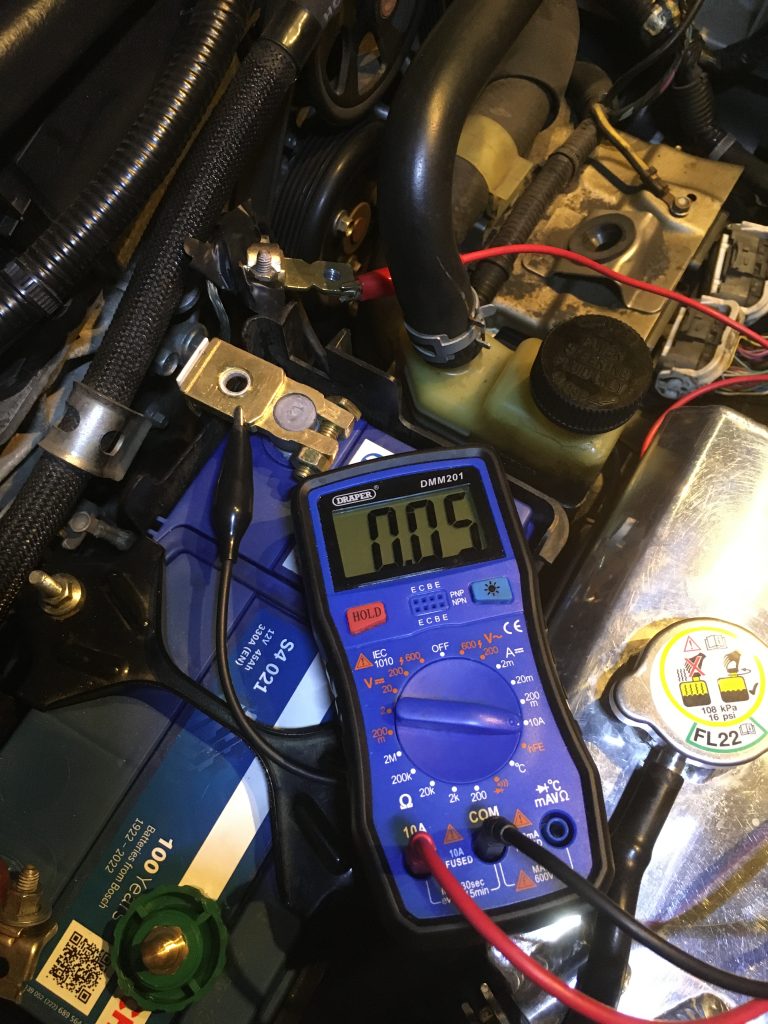
When idle, the car will consume less than 10A; otherwise, the battery would be drained within a few hours and likely wouldn’t start after just one hour. We are now within a safe range for measuring the leakage current. To prepare for this measurement, disconnect the terminal from the negative battery terminal. This is the terminal connected to the black cable. We can now set the multimeter to measure up to 10 A of direct current. Connect the red test lead to the terminal of the black wire. Connect the black test lead to the negative battery terminal. The total leakage current will then be displayed on the multimeter. Ideally, this should be no more than 50 mA or 0.05 A. If it’s higher, the battery is discharging faster than it should. If the leakage current is higher, it’s time to start troubleshooting. Monitor the leakage current for a while to determine if it’s stable. It’s possible that the leakage current isn’t constant but occurs periodically. The leakage current occurs intermittently—for example, for a few seconds every minute. This is similar to what you would expect from the intermittent setting on your windshield wipers. That setting only consumes energy when the wiper blades are moving, but not otherwise.
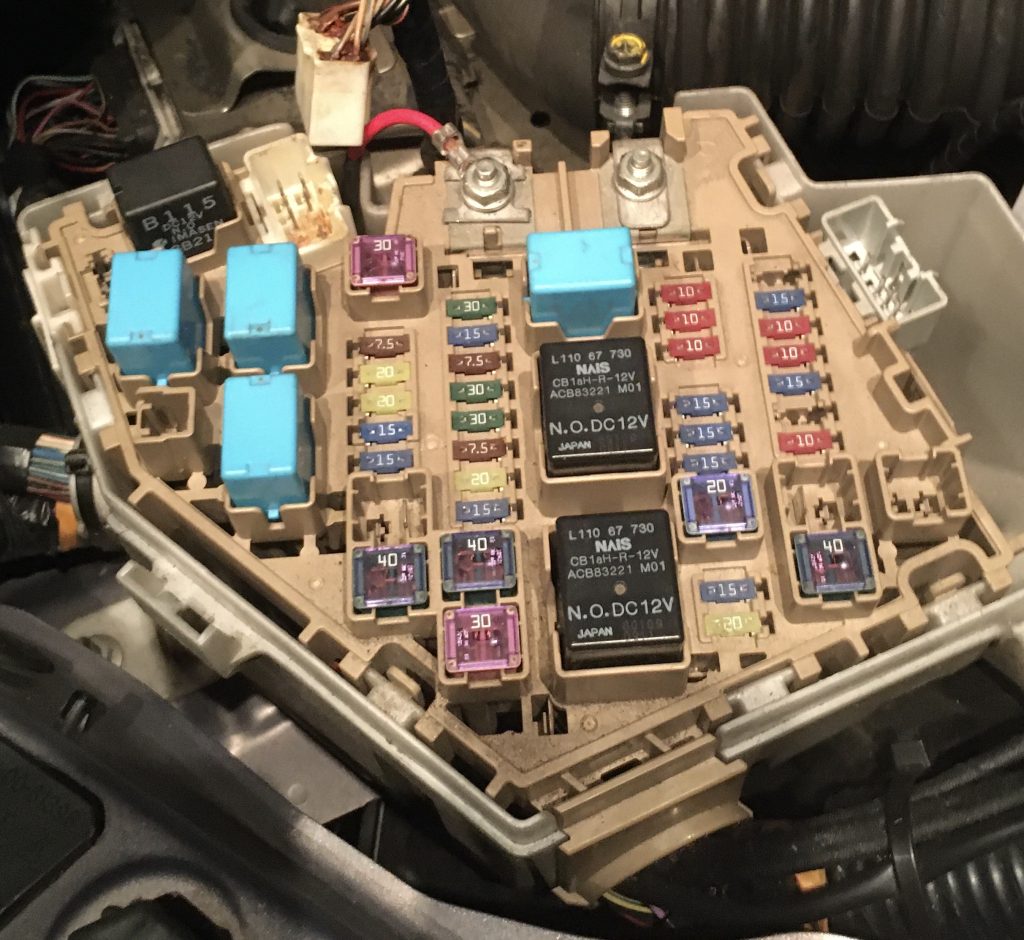
The next step is to determine which component is still drawing power and causing the excessive leakage current. There are two ways to do this. You can measure the voltage difference across the fuse, or remove the fuse. The voltage difference across the fuse should be 0 mV when no current is flowing through it. If the leakage current remains the same after removing a fuse, you can put the fuse back in. If the leakage current decreases, you’re a little closer to your goal, because that means something connected to that fuse is drawing current. In that case, don’t put the fuse back in right away. Continue in this manner until the measured leakage current is zero or nearly zero. To determine what is connected to each of the fuses, you can consult your car’s owner’s manual or wiring diagrams. If you don’t have those, send me a message, and I’ll see if I have anything for your car’s model year. The method of measuring the voltage drop across the fuse has become quite popular. This is partly because it’s faster and because removing a fuse can affect another component in the car. This happens, for example, when components are interconnected via the CAN bus. A loss of communication between components can cause other components in the car to “wake up” and start drawing power. This means you’re actually influencing the measured leakage current yourself.
The number of components connected to a fuse varies greatly. Seat heaters or air conditioning often have their own fuse, while other fuses may have more than ten components connected to them. If multiple components are connected to the same fuse, further investigation is needed. Each component has a connector containing wires that connect it to the car’s wiring harness. A component may be connected to multiple fuses. By unplugging the connector from the component, you prevent it from drawing any more current. After disconnecting a component, check whether the leakage current decreases. If it does not, move on to the next component. If the leakage current changes, you’re getting closer to your goal. If the leakage current drops to nearly zero, this component was the source of the leakage current. If the component cannot be repaired, a replacement part will need to be installed to resolve the issue. To verify, you can reconnect all the connectors and measure the leakage current again.
WARNING:
If you want to take other measurements after measuring leakage currents, first disconnect the multimeter leads from the car. Set the red lead to the position for measuring resistance or voltage to prevent damage to the multimeter. I forgot to do that myself and tried to measure the battery voltage. That caused permanent damage to the multimeter, which has been unable to measure current ever since. The current flowing through the circuit was too high and too fast, so the multimeter’s fuses couldn’t protect the circuit. So stay alert.
ALTERNATOR:
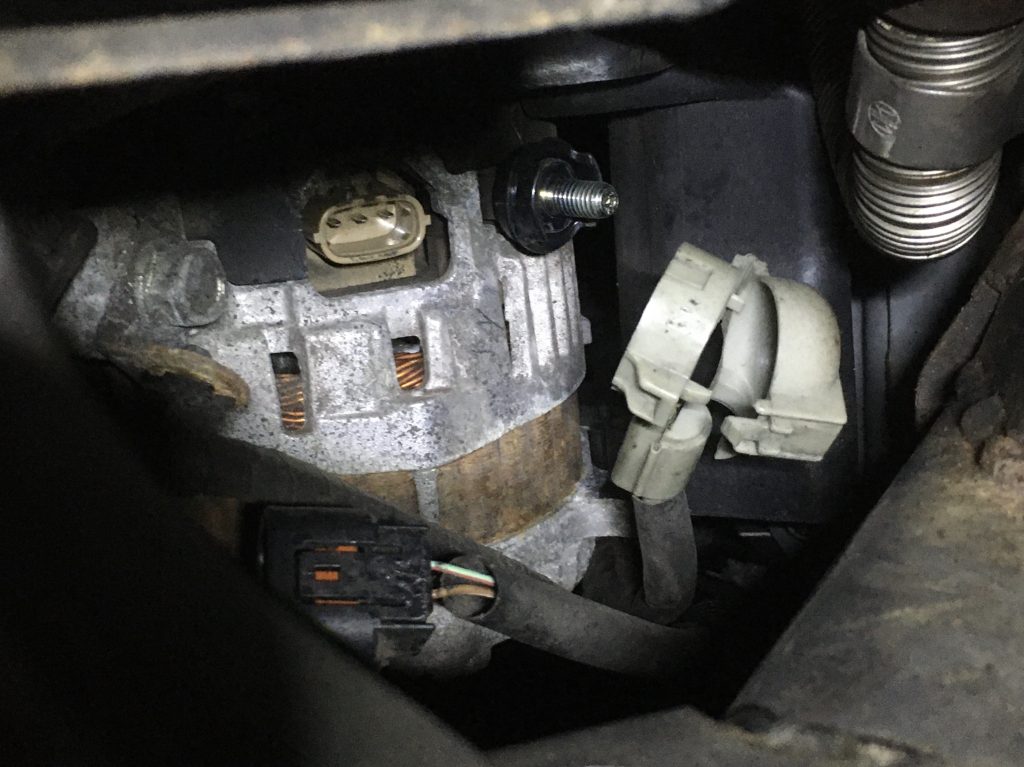
One special case I’d like to highlight is the alternator. An alternator in good condition does not cause any leakage current because the diodes built into it do not allow current to flow from the battery to the car’s ground. A good diode acts as a one-way valve, allowing current to flow in only one direction. For an alternator, this is in the direction of the battery, because that’s how the battery is recharged when the engine is running. If a diode is defective, current can also flow in the opposite direction. This causes the alternator to drain the battery.
To check this, disconnect the thick cable from the alternator. This is the cable between the battery and the alternator. Once that cable is disconnected from the alternator, we can measure the resistance between the point where the cable is attached (a threaded stud) and the alternator housing. To do this, set the multimeter to measure resistance. With the red probe on the housing and the black probe on the threaded end, the resistance should be a few hundred ohms. With the red probe on the threaded end and the black probe on the housing, there should be no connection—and thus infinite resistance. If that is not the case, then a diode in the alternator is faulty, and a leakage current may be flowing through the alternator. The alternator must then be repaired or replaced to resolve the leakage current issue.
TIP:
If you won’t be using the car for an extended period, it’s a good idea to connect a trickle charger to the battery. The trickle charger automatically detects whether the battery needs recharging and keeps it in good condition.
Personally, I’m very satisfied with the CTEK MXS 5.0, but the lighter version, the CTEK MXS 3.8, is probably sufficient for an MX-5 as well.

If you have any questions, you can reach me via the contact page
If this information has been helpful to you and you’d like to support my work for the MX-5 community, please consider subscribing to the YouTube channel. It costs just a small amount each month. It helps me continue to invest in developing new knowledge and experience that I can then share with you.
You can find more information about this here