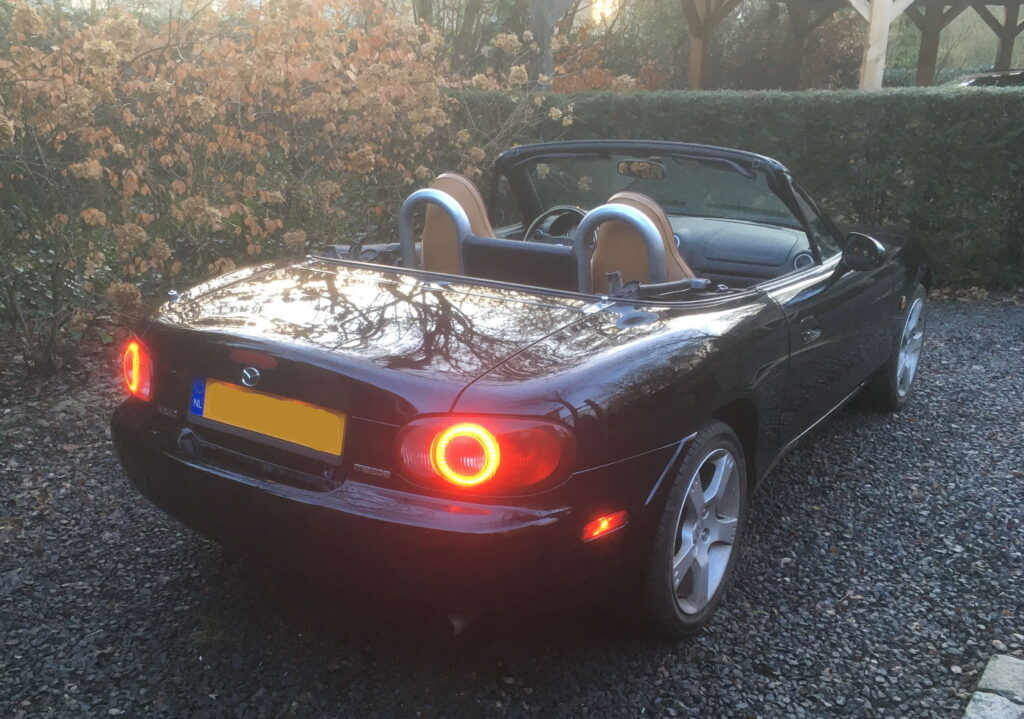
An upgrade for better visibility on the road. Lights instead of just reflectors.
In Canada, the first-generation Miatas were equipped with side marker lights in the bumpers. That means there’s a light behind the reflector. Orange reflectors in the front bumper and red reflectors in the rear bumper. If you ask me, it’s a great improvement to the visibility of our beloved little convertibles.
Further investigation revealed that when the NB was introduced, the side marker lights were eliminated, and only reflectors were installed. Following that decision, the wiring for the side marker lights was no longer included in the wiring harness. It appears that the colors vary by region. In Europe, the red reflectors in the rear bumper have been replaced with orange ones.
By installing LED rings in the taillights, the light moves more towards the center of the rear. That might mean you’re less visible from the side. Aside from that, I just thought it would be fun to have working side marker lights.
Searching for parts
I’d already seen some side marker lights online from across the ocean. Despite that, I decided to post a request anyway in an MX-5 buy-and-sell group on Facebook. Half an hour later, I was pleasantly surprised by someone who had a 1995 Canadian Miata parts donor. On top of that, the guy lived less than half an hour away from me. It didn’t take long before I was in the car and on my way to see him.
Once I got there, it turned out that all the wiring was still in place. That meant I would be able to connect it the original way. That’s always my preference, so I did the same this time. With this new purchase, I was able to go home to see what still worked and what didn’t. Then I figured out how to connect the lights to my NB2 wiring harness.
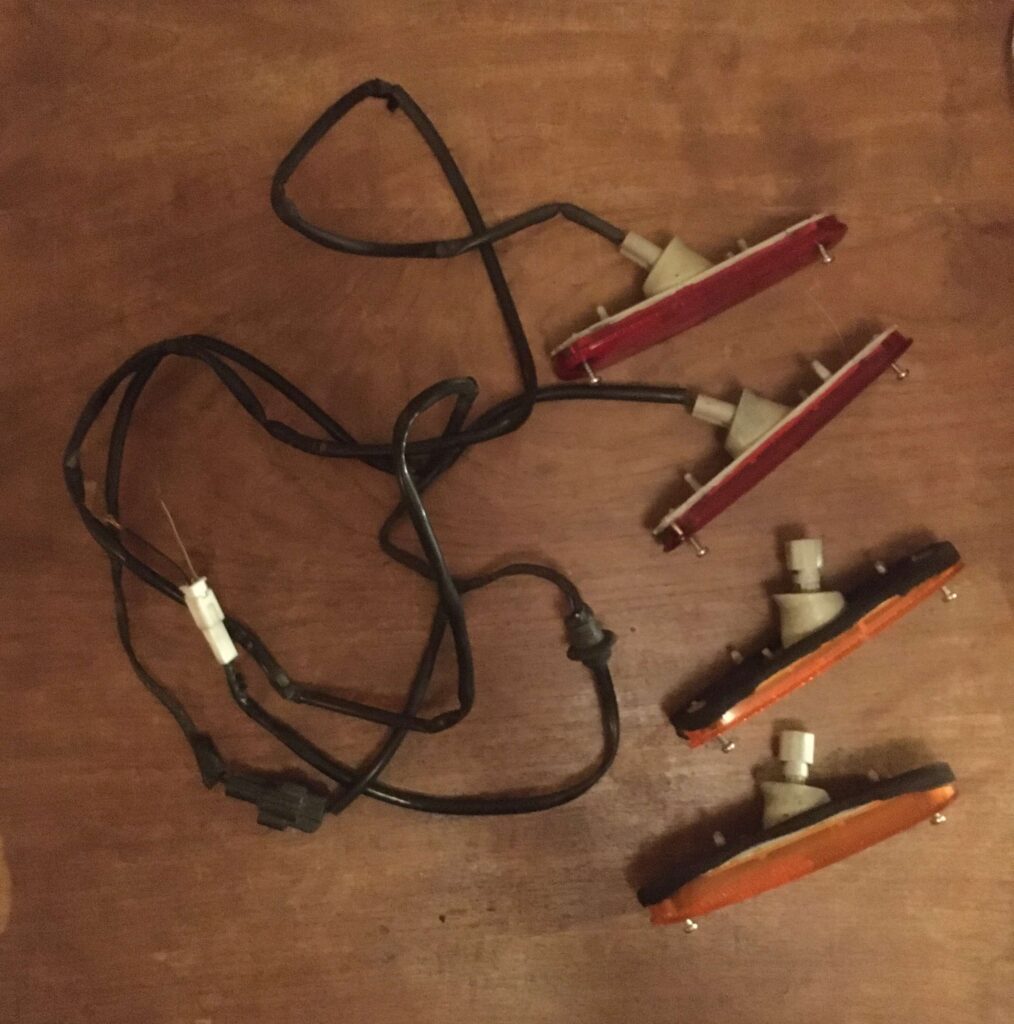
As you can see in the photo, I did have the wiring for the side marker lights on the rear bumper, but not for the front. The main reason for this is that there’s no connector at the front to connect the whole unit to the wiring harness. There, the wires from the wiring harness run directly to the lamp’s socket. Since I wanted to connect it the same way anyway, I drove by again a few weeks later and was then able to add the wiring and grommets to the set.
Challenges for the wiring
On the Miata, there was a hole in the rear side panel for the wiring, which was used to route the cable through.
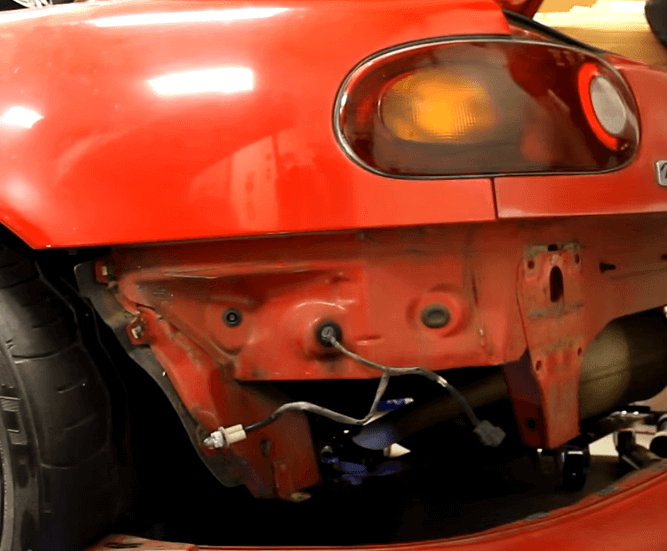
My NBFL didn’t have that opening, so I was literally and figuratively dependent on a workaround. In the end, it turned out there was a rubber plug in the bottom of the trunk, near the fuel tank vent. That opening allowed me to use it as a passageway for the cable.
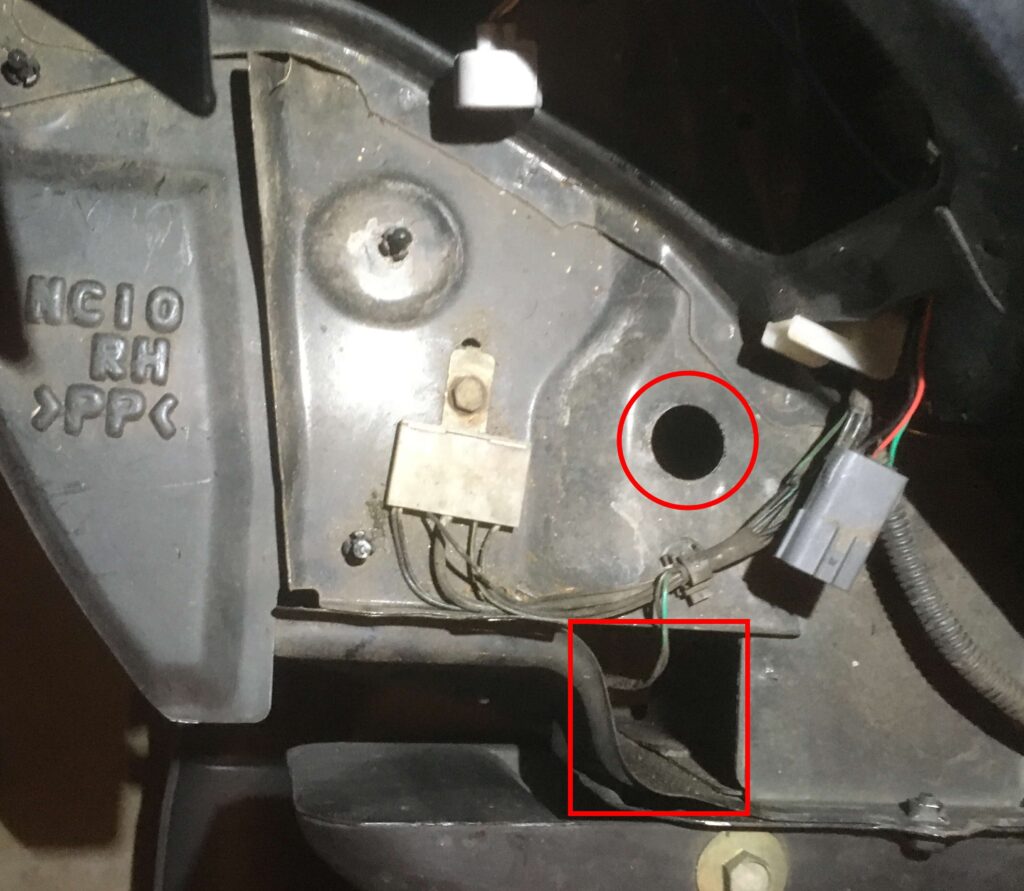
On the front, the wiring grommets were still there; you can find them under the headlights. A rubber grommet prevents the cable from rubbing against the sheet metal and potentially causing a short circuit over time. Of course, the wiring can also be routed through the large hole in the rectangle shown in the photo below. In that case, there’s a greater chance that the cable will rub against a sharp edge due to the car’s movements.
Once I figured out the right way to route the wiring, it was just a matter of connecting everything. You solder the right wires together to ensure that the side marker lights come on when the taillights are on. The result can be seen in the picture below.